Stormshield configuration
This document describes how to set up an IPsec connection with WALLIX One PAM and your Stormshield gateway.
Prerequisite
WALLIX One PAM side
You need some information about your WALLIX One PAM platform:
- IPsec endpoint address
- Subnets
For this example, we use the following values:
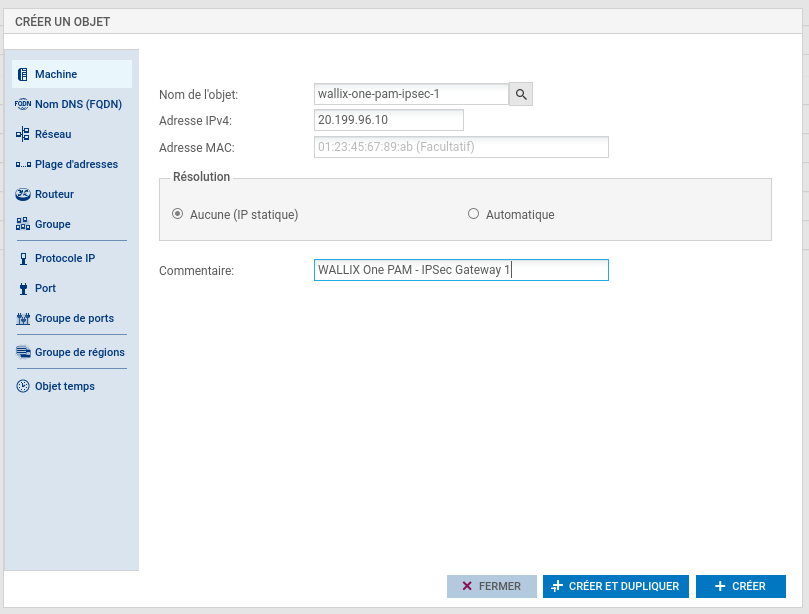
- IPsec endpoint address: 20.199.96.10
- Subnets:
- 100.64.12.0/25
- 100.64.13.0/25
- 20.199.99.129/32
Stormshield
This setup was tested using Stormshield AMI on AWS (AMI name: STORMSHIELD Cloud UTM 4.5.1 EVA-73c372ac-8bf8-4c2a-9624-5a5b1b3e783e).
Stormshield network security devices do not support route-based traffic selectors. By extension, only static routing with policy-based traffic selectors is supported.
Configuration
Objects
Create all objects corresponding to subnets exported by WALLIX One PAM. Go to page CONFIGURATION > OBJECTS > Network.
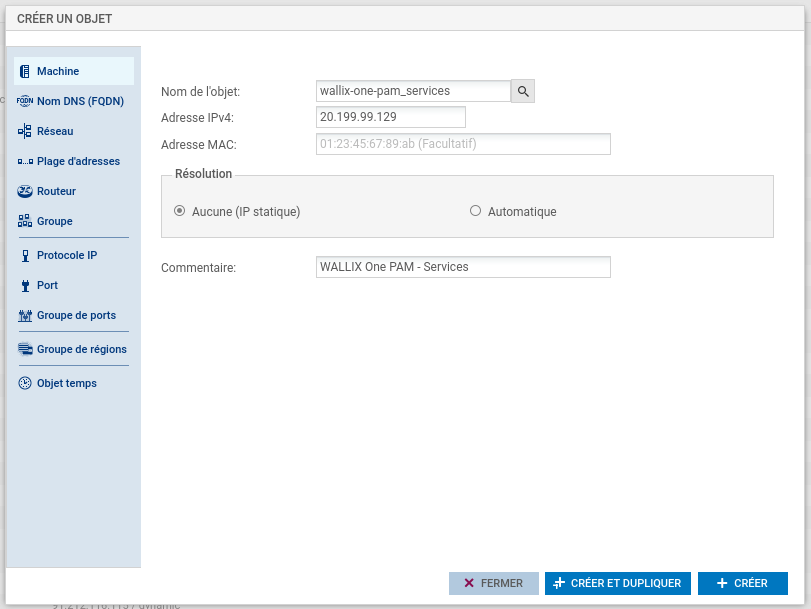
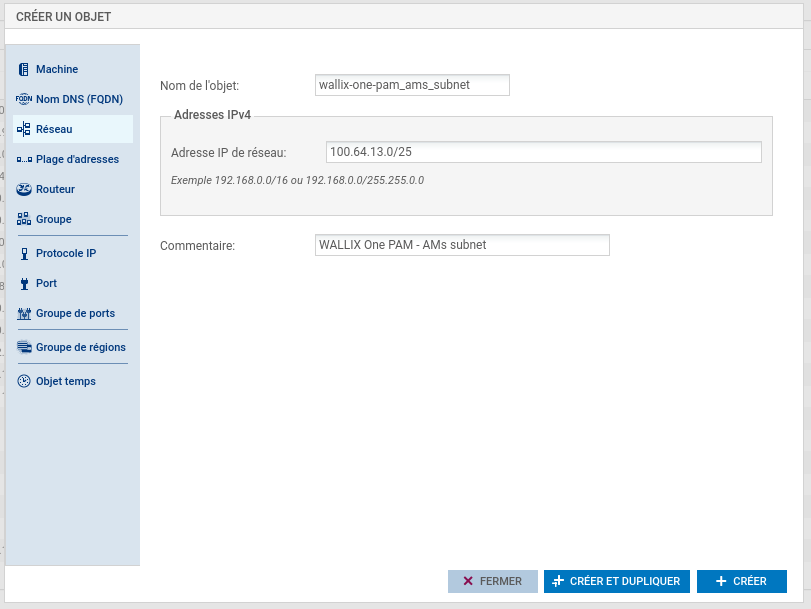
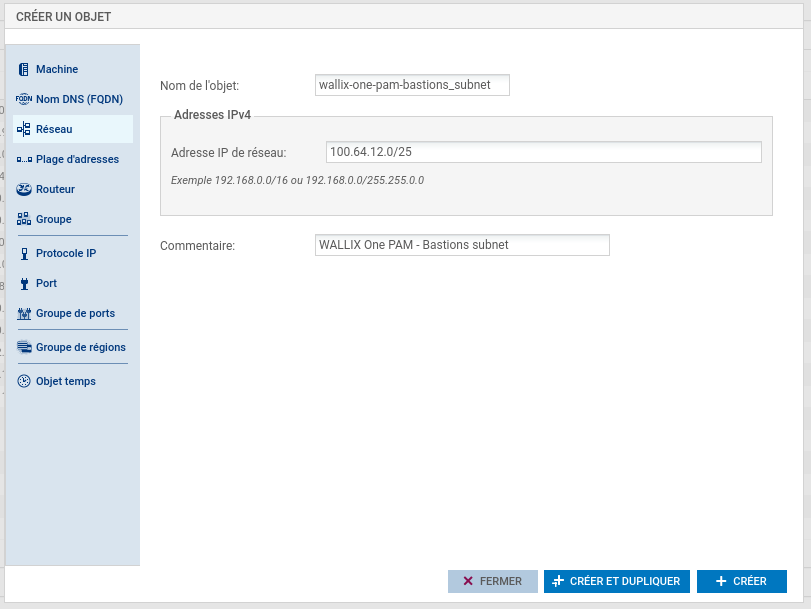
Create object related to WALLIX One PAM IPsec gateway.
Policies
Create IKE and IPsec policies. Go to page CONFIGURATION > VPN > IPsec VPN > ENCRYPTION PROFILES.
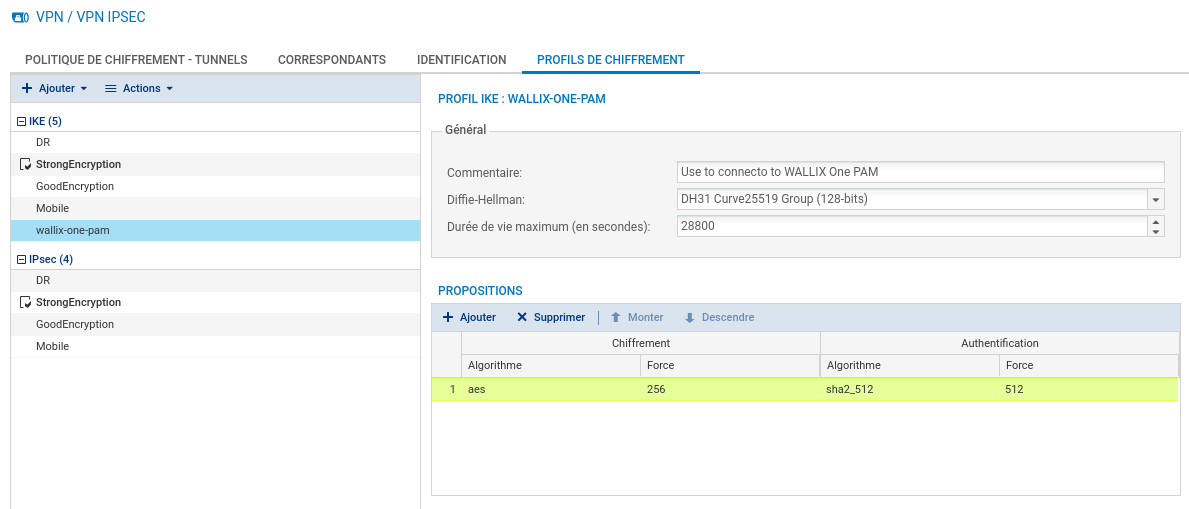
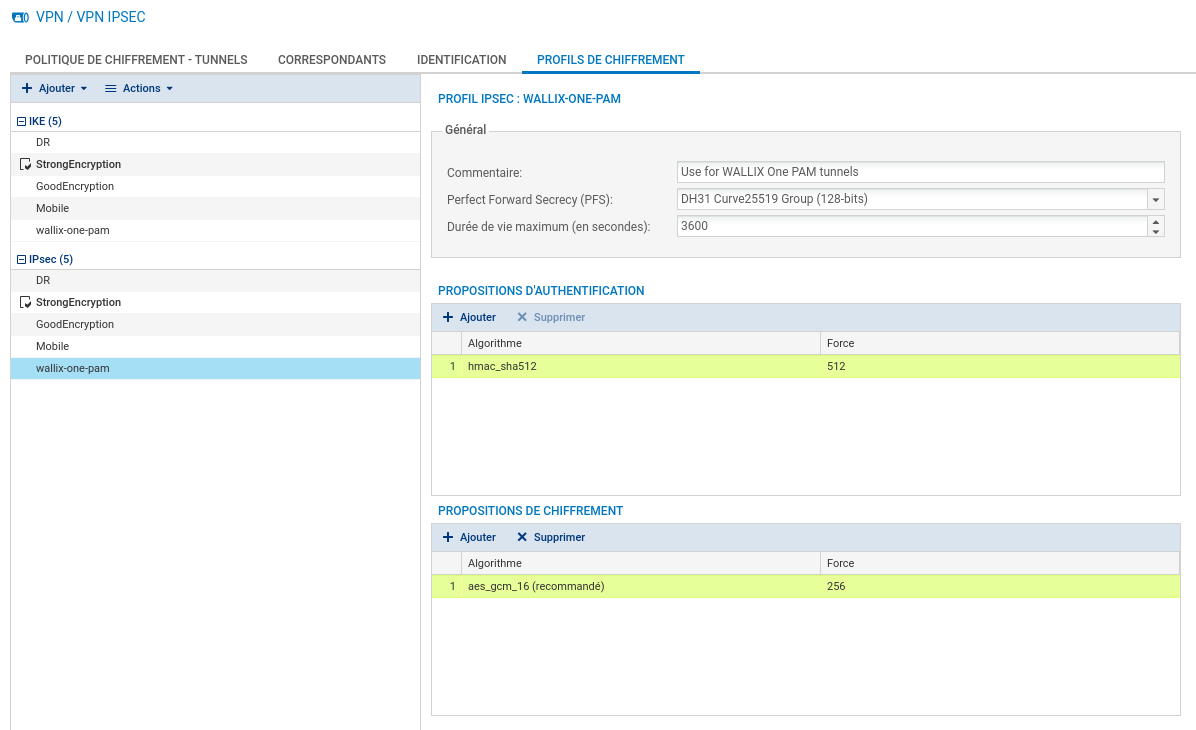
In this example, we use the strongest algorithms for encryption, integrity, ...
You can select other supported algorithms if you need more performance.
Remote gateway
Create IPsec remote gateway. Go to page CONFIGURATION > VPN > IPsec VPN > PEERS.
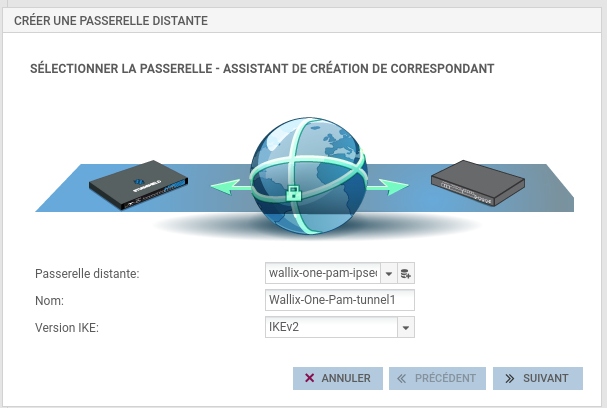
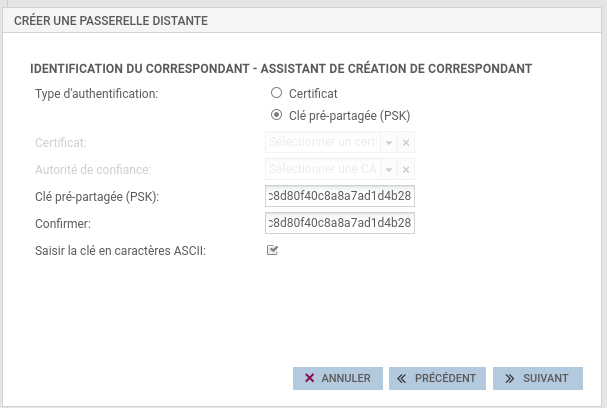
Define your own PSK. It must contain only letters (lowercase and uppercase), numbers and underscores, with a size between 32 and 128 characters.
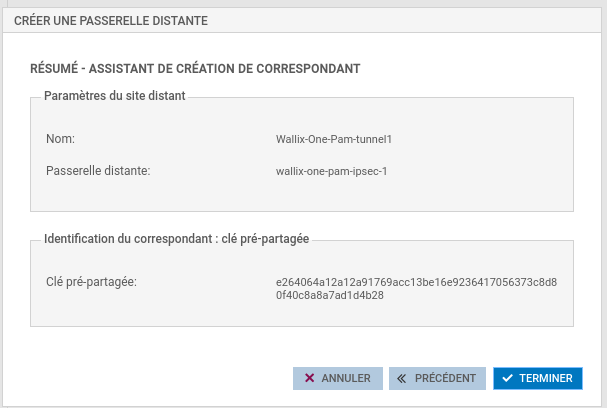 Validate informations and finish.
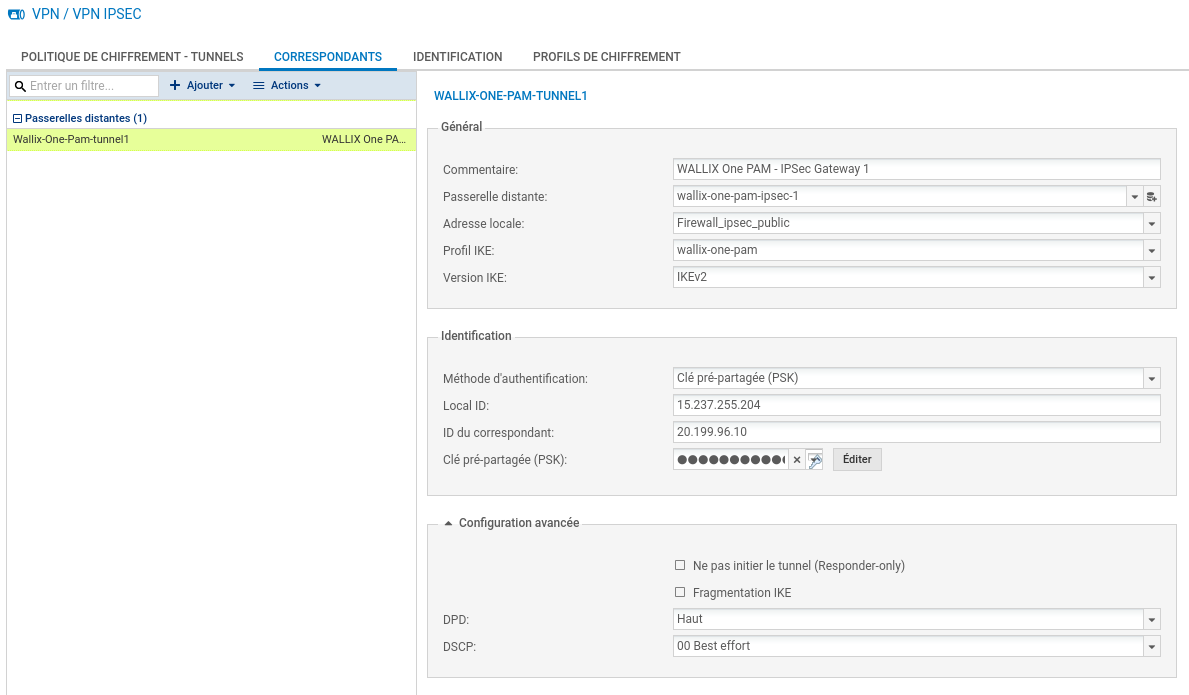 The following settings need to be modified:
- Local address : e.g.
Firewall_out - Local ID: your public IP address
- Remote ID: WALLIX One PAM IPsec endpoint address
- IKE profile: to wallix-one-pam
- DPD: High
Enable remote gateway and save all your changes.
Tunnels
Go to page CONFIGURATION > VPN > IPsec VPN > ENCRYPTION POLICY - TUNNELS.
Create a tunnel for all remote subnets and for all local subnets. Choose wallix-one-pam encryption profile.

Select 'wallix-one-pam' cipher profile and set Keep alive to 30.
THe
Local networkCIDR value must be exactly the same than the one provided in attributephase2_subnetsof schema of WALLIX One PAM requestPOST /tenant/{tenant_name}/peer.
Send configuration to WALLIX support
The following information must be declared in the shuttle document for the configuration of the IPsec tunnel:
- name: choose a name for this tunnel (e.g., Stormshield-hq)
- ip_address: your Stormshield appliance public ip address (e.g., 15.237.255.204)
- psk: the pre-shared key defined previously (the original one, not the hexadecimal value shown by Stormshield GUI)
- phase1_ciphers: AES256
- phase1_integrity: SHA2_512
- phase1_lifetime: 28800
- phase2_ciphers: AES256_GCM_16
- phase2_integrity: SHA2_512
- phase2_lifetime: 3600
- dhs: 31
- routing_mode: "static"
- use_policy_based_traffic_selector: true
- phase2_subnets:
Local networksubnets used to configure tunnels (e.g. ['10.1.0.0/16'])
These settings must be provided to WALLIX support to establish the IPsec tunnel.
Status
To check the status go to Monitoring > Supervision > Tunnels VPN IPsec.


